Display Modes
Inkscape offers a number of display modes to display your work in different ways on the canvas. You can find them in the View menu > Display Modes.
You can display a document in the following modes:
- Normal
Displays a document normally. Let’s use this simple drawing as an example.
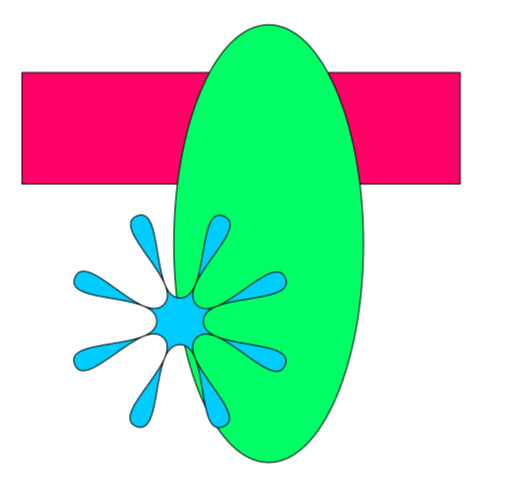
A simple drawing in Normal display mode
- Outline
Displays an outline of the objects in the drawing by hiding fills, strokes and filters. Objects will display with a one-pixel-wide stroke and no fill, regardless of zoom level. Text will display normally but without color. Images will display as a crossed-out red box. This mode enables you to quickly preview basic elements in a document. Here’s an example.
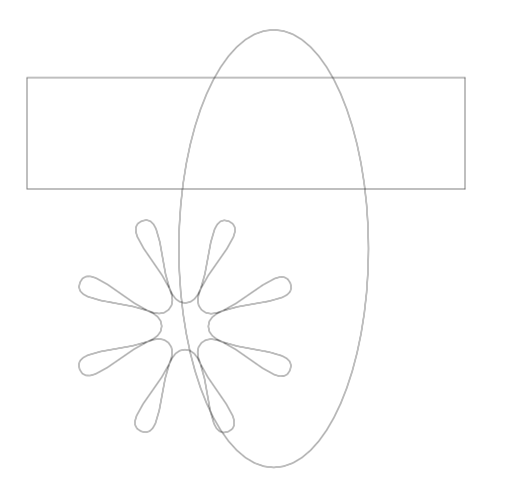
A simple drawing in Outline display mode
- Outline Overlay
Displays a document with a translucent white overlay over all objects, and the outline on top of it. The outlines behave the same as the outline mode. Here’s an example.
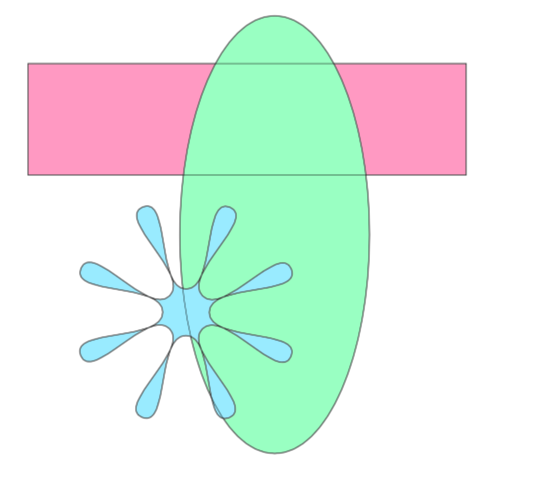
A simple drawing in Outline Overlay display mode
You can adjust the overlay opacity in the Preferences.
- Enhance Thin Lines
Displays extremely thin strokes with a visible line at different zoom levels. In particular, when a stroke holds less than 0.5px in width on-screen, this mode raises it to 0.5px. This mode is especially helpful when drawing designs for digital cutters. Some hardware models require extremely thin (hard to see) lines.
- No Filters
Displays a document containing filters, as if there were no filters.
Note
Blurs are simple filters. If the blur slider has no effect, you may be in this display mode.
The display mode you choose affects how much computer resources are needed to render a document. For instance, the Outline and No Filters modes would render faster than the Normal mode.
See also
How to adjust filter effects display quality.
Other Display Settings
There are also a couple of other display settings:
- View menu > Gray Scale
Displays a document in gray scale, a mode that only keeps the lightness of a color. Useful for previewing printing with a black-and-white printer. Here’s an example.
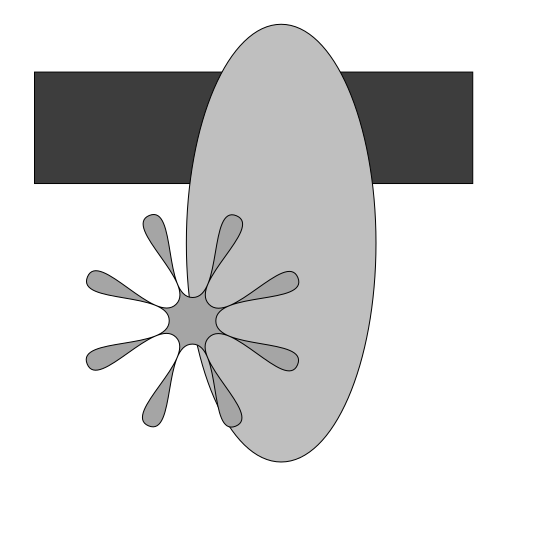
A simple drawing showing Gray Scale
- View menu > Color Management
Displays a document with your color profile of choice applied.
Attention
This doesn’t work yet in 1.5.
The Display Mode Popup
Besides the View menu, you can also access the Display Modes via a Display Mode Popup at the top-right corner of the canvas. The icon shown is dependent on the mode you’re in, but in general it resembles a computer screen.
When clicked, you can have access to all the aforementioned display modes, as well as color management and grayscale toggles.
Below those, there are 2 non-interactive items, serving as reminders of shortcuts:
Q: When pressed, zooms to the selection.
F: When pressed, hides guides, grids, and everything outside page borders.
At the bottom, there is a checkbox to determine whether the zoom level will change when the window size is changed.
Note
If you cannot see the display mode popup, check to see if you have hidden the scrollbars: and click Scrollbars, or press the shortcut CtrlCmdB.
Toggle, Cycle and Troubleshoot
When you are in modes except for Normal and Color Management, it indicates as such in the titlebar.
To work with display modes:
To |
Do one of the following |
|---|---|
Enable a display mode |
|
Cycle through display modes |
|
Toggle between Normal and the last used display mode |
Select . |
Toggle Gray Scale mode |
|
Toggle Color Management mode |
|
Todo
Assess whether this really belongs here (perhaps it should be under UI)– comment from brynn - At first I thought it seems appropriate. But most of it repeats information that was given above. So now I’m thinking it probably is not needed.
Consult someone or the source code for these modes
Add figures for each mode - from brynn - you mean the tiny icon in the corner? I’d keep at the bottom of our todo list
Add display mode popup screenshot