Menu Bar
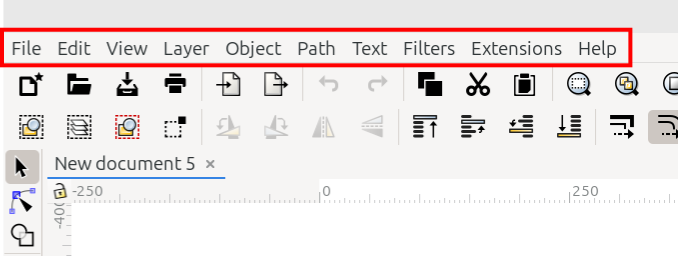
The menu bar
In the screenshot above, you can see the top-left corner of an Inkscape window. The red rectangle highlights the menu bar. There are 10 menus, which collectively provide the vast majority of the commands and options needed to use Inkscape.
Todo
Make sure to use the default version of Inkscape to make screenshots. When there are different icons related to different OS, show all 3 icons. Also make sure the same person makes the “circles and arrows” so that they look consistent throughout the manual.
Tip
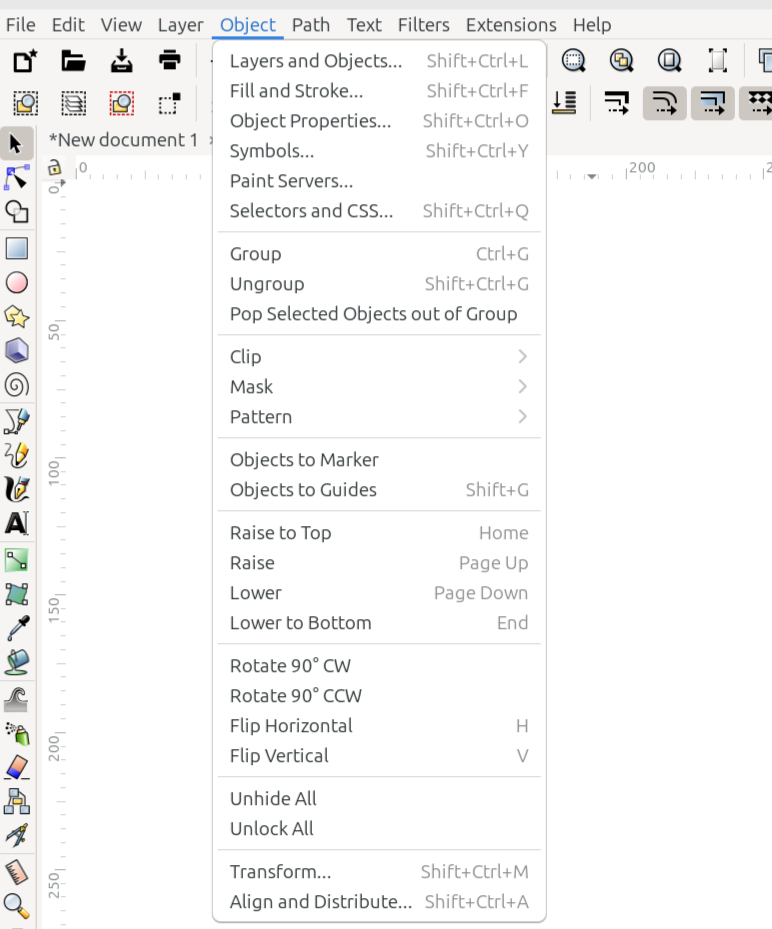
Although the full list of keyboard shortcuts is found on the Inkscape website, most of the menu items also show the keyboard shortcut for that command. So if beginners start out with Inkscape by using menus, it is a convenient way to start learning the keyboard shortcuts. Notice the shortcuts in the Layer menu, in the image below.

An example of an open menu. This shows the menu bar with the Layer menu open.
File Menu
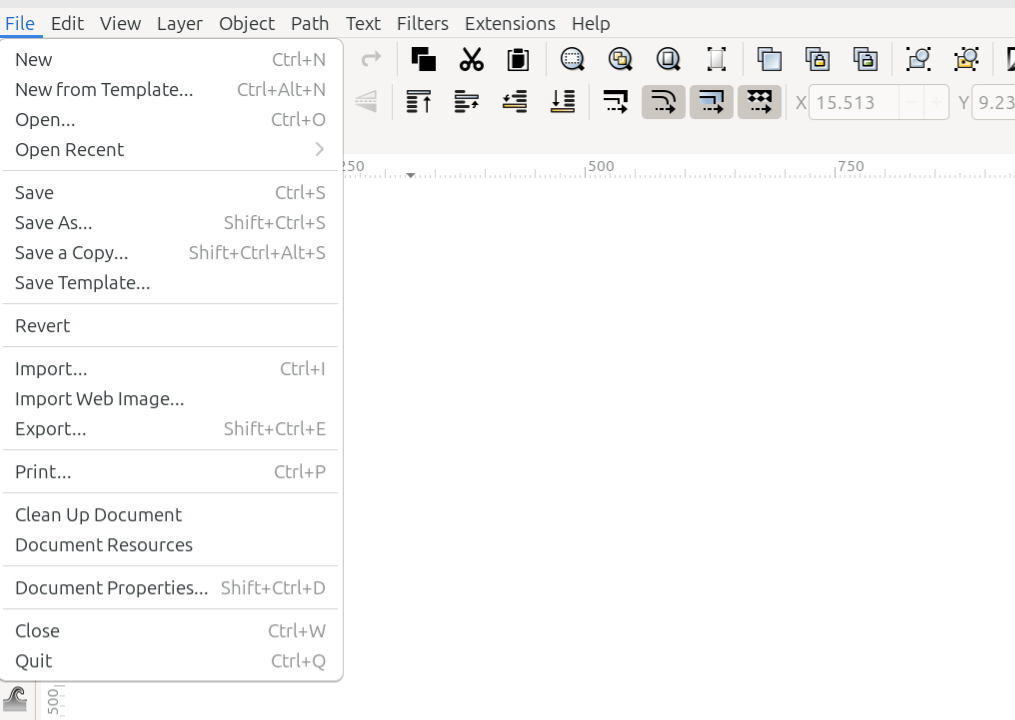
The File menu
The File menu contains commands for managing files, or documents. The list below shows how the commands are listed in the File menu, and gives a brief explanation for what each command does. To learn detailed information about the commands’ functionality, please follow the links.
Command or Option |
What it Does |
|---|---|
Opens a new default document |
|
Opens the New from Template dialog |
|
Opens the file manager |
|
Reveals a dropdown menu showing recently opened files |
|
Saves the open file |
|
Opens the Save As dialog |
|
Saves a copy of the document with a new name and/or location |
|
Saves the document as a template |
|
Returns the document to the point where the last save was made |
|
Opens the Import dialog |
|
Opens the Import Web Image dialog |
|
Opens the Export dialog |
|
Opens the Print dialog |
|
Removes data from the file that is no longer needed |
|
Opens the Document Resources dialog |
|
Opens the Document Properties dialog |
|
Closes the active tab |
|
Closes all Inkscape windows |
Edit Menu
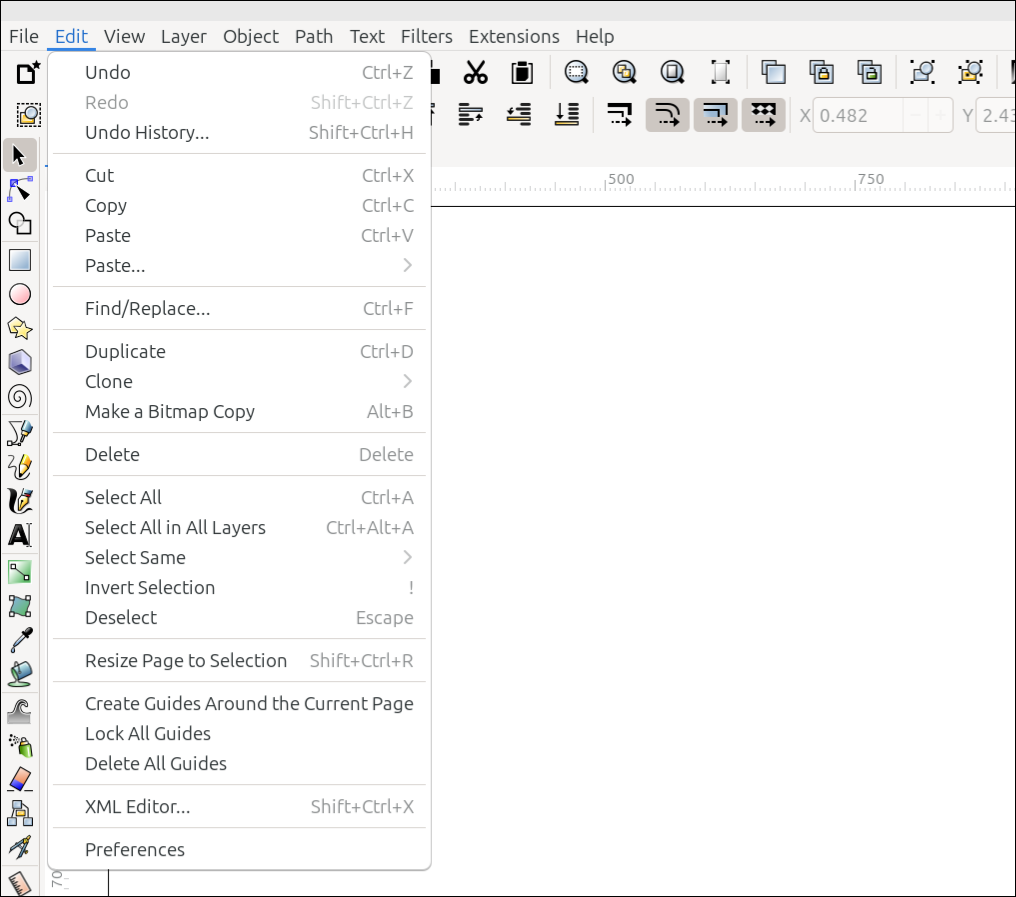
The Edit menu
Commands for editing a drawing are found in the Edit menu. They are listed below, with a brief description of what each of them does. Please follow the links to find detailed information about them.
Command or Option |
What it Does |
|---|---|
Reverts the last edit made on the canvas |
|
Reinstates the change that was previously reverted |
|
Opens the Undo History dialog |
|
Deletes the selection (after silently copying) |
|
Copies the selection |
|
Pastes the selection that was cut or copied |
|
Reveals a dropdown menu offering several paste options |
|
Opens the Find/Replace dialog (guessed link location) |
|
Duplicates the selection |
|
Reveals a dropdown menu offering several options related to cloning |
|
Places a PNG version of the selected object on the canvas (guessed manual/link location) |
|
Deletes the selection |
|
Selects everything from various areas of the canvas, depending on Preference choices |
|
Selects everything in all layers |
|
Reveals a dropdown menu offering several selection options |
|
Deselects the selection, and selects everything else |
|
Deselects the selection |
|
Changes the page size to match the selection on the canvas |
|
Creates four guides, one on each page boundary |
|
Locks all guides |
|
Deletes all guides |
|
Opens the XML Editor |
|
Opens the Preferences dialog |
Todo
Double-check Find/Replace, Make a Bitmap Copy, - I guessed where these link location will be in the manual. For Select All - fill in the correct Category under Preferences, after those categories have been created. Also delete my comments after those items are fixed.
View Menu
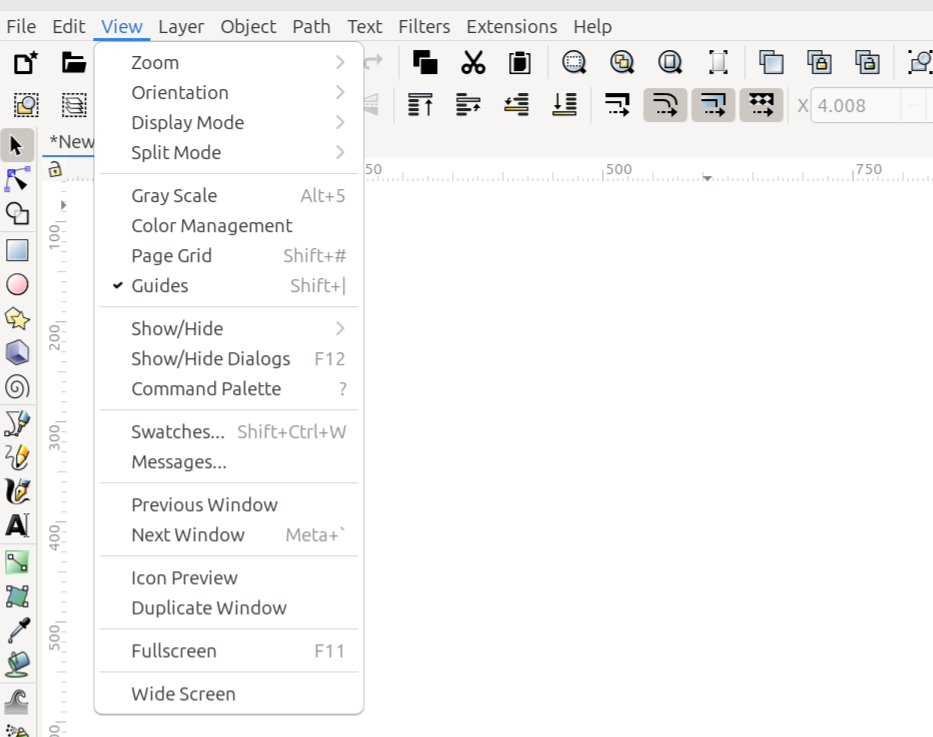
The View menu
The View menu offers options for setting up the interface in whatever way the user would like. The list below shows how they appear in the menu, along with a brief description of each item.
Command or Option |
What it Does |
|---|---|
Zoom (I guessed where Zoom will be in the manual.) |
Reveals a dropdown menu offering many different options for zooming the window |
Orientation (I guessed where Orientation will appear in the manual.) |
Reveals a dropdown menu offering several options for how the window is displayed |
Reveals a dropdown menu offering five display modes to choose from |
|
Split Mode (guessed about the manual location) |
Reveals a dropdown menu offering three choices for splitting the canvas into two sections |
Enables or disables Gray Scale mode |
|
Enables or disables Color Management mode |
|
Toggles the visibility of grids |
|
Toggles the visibility of guides |
|
Show/Hide (guessed manual location) |
Reveals a dropdown menu where users can choose which parts of the interface they would like to show or hide |
Show/Hide Dialogs (guessed manual location) |
Toggles whether all dialogs will temporarily be shown or hidden |
Displays the command palette |
|
Opens the Swatches dialog |
|
Messages… (not sure the manual location - not even a guess) |
Opens the Messages dialog (for developers) |
Previous Window (not sure the manual location - Interface > Canvas?) |
Opens the previously opened window, if more than one window is open (does not apply to tabs) |
Next Window (not sure the manual location - Interface > Canvas?) |
Opens the next window, if more than one window is open (does not apply to tabs) |
Icon Preview (not sure where this will be in the manual) |
Opens the Icon Preview dialog |
Duplicate Window (not sure where this will be in the manual) |
Opens the same document in another window |
Full Screen |
Toggles Full Screen mode |
Wide Screen (not sure where this will be in the manual) |
Places the commands bar along the right side of the window |
Todo
For all the items above where I wrote “I guessed….” or “not sure….”, we need to decide where these items will be covered in the manual, and correct the links, if I guessed wrong. Don’t forget to delete my comments, after the items are fixed.
Layer Menu
The Layer menu
All the commands and options for manipulating layers can be found in the Layer menu. They are listed below, along with a brief description of what they do. For a more detailed explanation, please see the Object Manipulation section.
Command or Option |
What it Does |
|---|---|
Layers and Objects… |
Opens the Layers and Objects dialog |
Add Layer… |
Adds a new layer |
Rename Layer… |
Opens the tiny Rename Layer dialog |
Show/Hide Current Layer |
Shows or hides the current layer |
Lock/Unlock Current Layer |
Locks or unlocks the current layer |
Switch to Layer Above |
Selects the layer above the current layer in the layer stack |
Switch to Layer Below |
Selects the layer below the current layer in the layer stack |
Move Selection to Layer Above |
Moves the selection to the layer above the current layer in the layer stack |
Move Selection to Layer Below |
Moves the selection to the layer below the current layer in the layer stack |
Move Selection to Layer… |
Opens the tiny Move to Layer dialog |
Layer to Top |
Moves the current layer to the top of the layer stack |
Raise Layer |
Raises the current layer by one level within the layer stack |
Lower Layer |
Lowers the current layer by one level within the layer stack |
Layer to Bottom |
Moves the current layer to the bottom of the layer stack |
Duplicate Current Layer |
Duplicates the current layer |
Delete Current Layer |
Deletes the current layer |
Object Menu
The Object menu
The Object menu contains options and commands for manipulating objects. The list below shows how they are organized in the menu, along with a brief description of what each one does. These may be found in various sections of the manual, where there are more detailed explanations.
Command or Option |
What it Does |
|---|---|
Opens the Layers and Objects dialog |
|
Opens the Fill and Stroke dialog |
|
Opens the Object Properties dialog |
|
Opens the Symbols dialog |
|
Opens the Paint Servers dialog |
|
Opens the Selectors and CSS dialog |
|
Combines selected objects into a group |
|
Disbands the group into its originally selected objects |
|
Removes selected objects from a group without the need to ungroup |
|
Reveals a dropdown menu offering clipping commands and options |
|
Reveals a dropdown menu offering masking commands and options |
|
Reveals a dropdown menu offering pattern commands |
|
Converts the selected object to a marker |
|
Converts the selected object’s outlines to guides |
|
Moves the selected object to the top level of the z-order stack, within the layer |
|
Moves the selected object up one level in the z-order stack |
|
Moves the selected object down one level in the z-order stack |
|
Moves the selected object to the bottom level of the z-order stack, within the layer |
|
Rotates the selected object 90° clockwise |
|
Rotates the selected object 90° counterclockwise |
|
Flips the selected object horizontally (side to side) |
|
Flips the selected object vertically (top to bottom) |
|
Unhides (reveals) all objects |
|
Unlocks all objects |
|
Opens the Transform dialog |
|
Opens the Align and Distribute dialog |
Path Menu
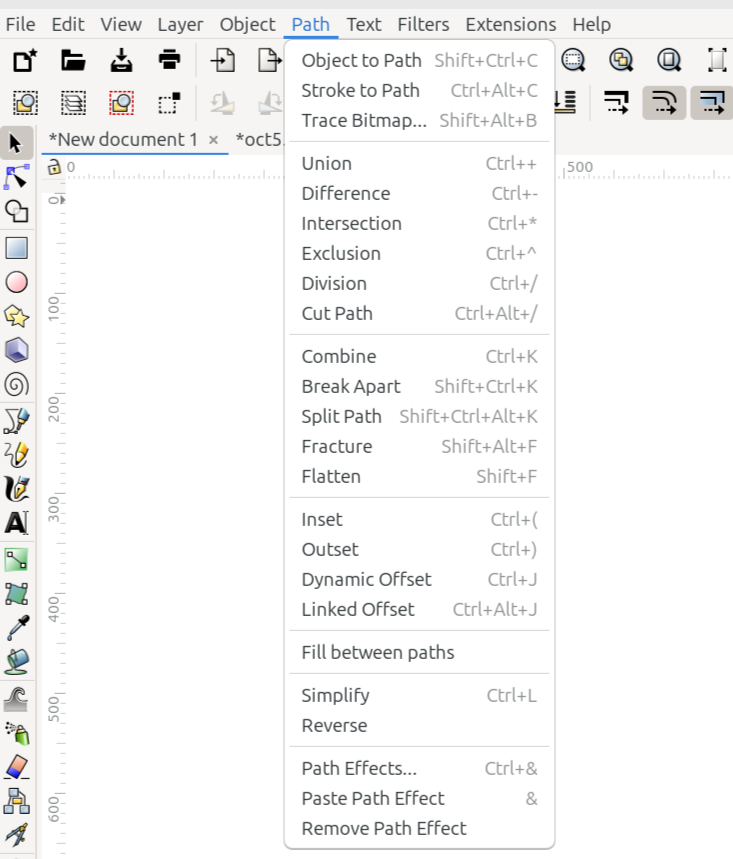
The Path menu
Commands for manipulating paths are found in the Path menu. They are listed below with a brief description of what they do. Detailed explanations for most of them can be found in the Node and Path Manipulation section.
Command or Option |
What it Does |
|---|---|
Converts selected objects to paths |
|
Converts strokes to paths |
|
Trace Bitmap… |
Opens the Trace Bitmap dialog (not sure where it will be located in the manual) |
Path operation that unions or adds two or more paths together |
|
Path operation that differences or subtracts one path from another |
|
Path operation the creates an intersection of two or more paths |
|
Path operation that results in non-intersecting parts |
|
Path operation that divides the bottom path into two or more pieces |
|
Path operation similar to Division except results are only paths, no fills |
|
Combines two or more paths to create a compound path |
|
Breaks a compound path apart into single paths |
|
Splits selected paths into non-overlapping sections |
|
Breaks two or more overlapping objects into all possible segments |
|
Flattens one or more overlapping objects into their visible parts |
|
Inset the selected path by configurable steps |
|
Outsets the selected path by configurable steps |
|
Offsets the selected path dynamically |
|
The dynamic offset is linked to its original path |
|
tbd |
|
Removes excessive nodes |
|
Reverses the path direction |
|
Opens the Live Path Effects dialog |
|
Pastes the copied path effect to another object |
|
Removes the path effect from a selected object |
Todo
Fill Between Paths might be changed before 1.5 is released. Also find out where Trace Bitmap will be covered in the manual, then make the correct link. Delete comments after items are fixed.
Text Menu
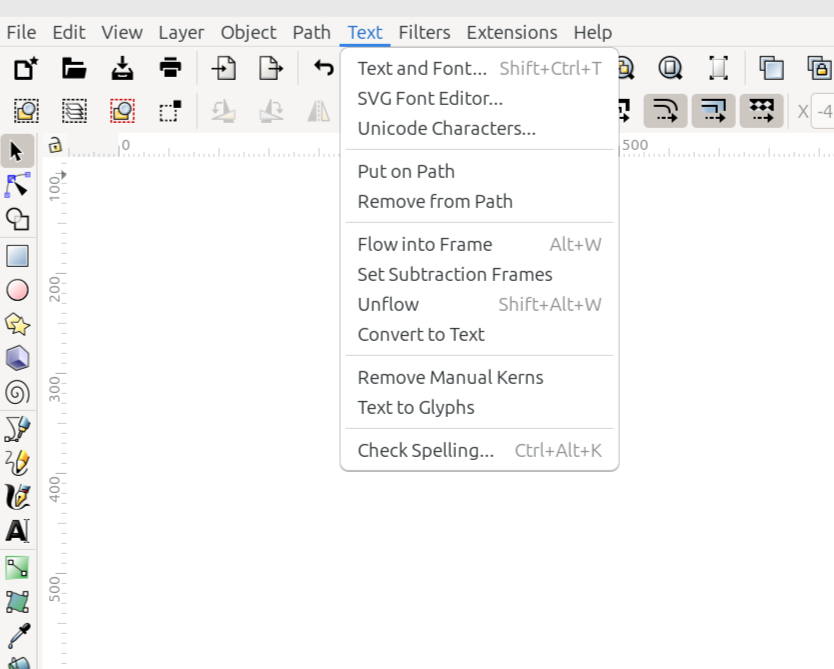
The Text menu
The Text menu contains all the options and commands for creating and manipulating text. The list below shows how they appear in the Inkscape window, along with a brief description for each item. For a complete explanation, see the Text section of the manual.
Command or Option |
What it Does |
|---|---|
Opens the Text and Font dialog |
|
Opens the SVG Font Editor |
|
Opens the Unicode Characters dialog |
|
Puts the selected text on the selected path |
|
Removes text from a path |
|
Flows text inside a frame object |
|
Flows text around a frame object |
|
Removes text from the frame |
|
Converts flowed text to regular text |
|
Removes manual kerns from text |
|
Converts text to glyphs |
|
Opens the Check Spelling dialog |
Filters Menu
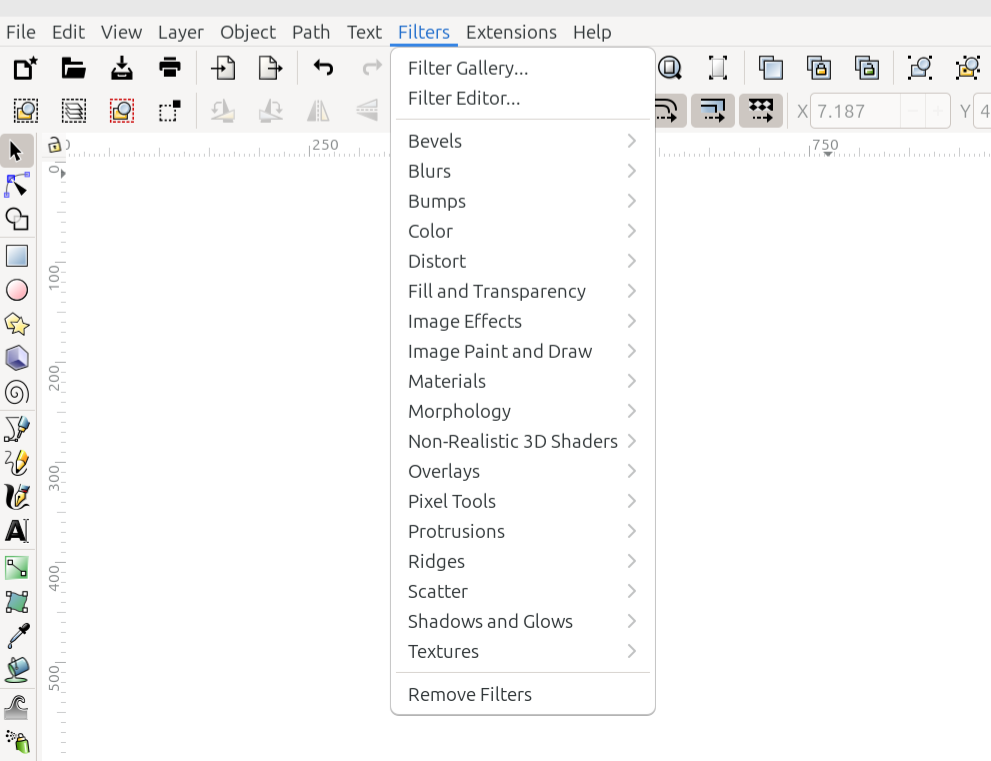
The Filters menu
The Filters menu contains both the filters which were installed with Inkscape, and any filters which the user may have installed later. Those that are installed with Inkscape are listed below, along with 3 other commands related to filters. To learn how to install new filters, please see the Filters section.
Command or Option |
What it Does |
|---|---|
Opens the Filter Gallery dialog |
|
Opens the Filter Editor |
|
Reveals a dropdown menu of all the filters in this category |
|
Reveals a dropdown menu of all the filters in this category |
|
Reveals a dropdown menu of all the filters in this category |
|
Reveals a dropdown menu of all the filters in this category |
|
Reveals a dropdown menu of all the filters in this category |
|
Reveals a dropdown menu of all the filters in this category |
|
Reveals a dropdown menu of all the filters in this category |
|
Reveals a dropdown menu of all the filters in this category |
|
Reveals a dropdown menu of all the filters in this category |
|
Reveals a dropdown menu of all the filters in this category |
|
Reveals a dropdown menu of all the filters in this category |
|
Reveals a dropdown menu of all the filters in this category |
|
Reveals a dropdown menu of all the filters in this category |
|
Reveals a dropdown menu of all the filters in this category |
|
Reveals a dropdown menu of all the filters in this category |
|
Reveals a dropdown menu of all the filters in this category |
|
Reveals a dropdown menu of all the filters in this category |
|
Reveals a dropdown menu of all the filters in this category |
|
Removes filters from the selected object |
Extensions Menu
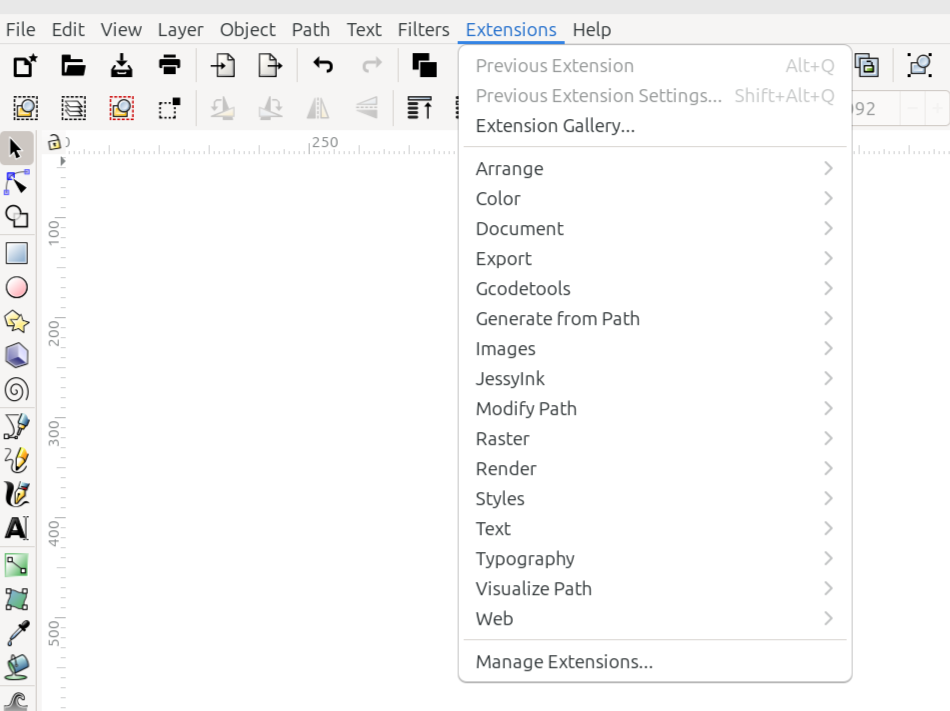
The Extensions menu
The extensions which were installed with Inkscape, along with any extensions the user might have installed, are listed in the Extensions menu. Those which are installed with Inkscape are listed below. To learn how to install extensions, as well as how to use them, please see the manual section, Extensions.
Command or Option |
What it Does |
|---|---|
Applies the extension used previously, to the currently selected object |
|
Applies the extension used previously, with new settings, to the currently selected object |
|
Opens the Extension Gallery dialog |
|
Reveals a dropdown menu of all the extensions in this category |
|
Reveals a dropdown menu of all the extensions in this category |
|
Reveals a dropdown menu of all the extensions in this category |
|
Reveals a dropdown menu of all the extensions in this category |
|
Reveals a dropdown menu of all the extensions in this category |
|
Reveals a dropdown menu of all the extensions in this category |
|
Reveals a dropdown menu of all the extensions in this category |
|
Reveals a dropdown menu of all the extensions in this category |
|
Reveals a dropdown menu of all the extensions in this category |
|
Reveals a dropdown menu of all the extensions in this category |
|
Reveals a dropdown menu of all the extensions in this category |
|
Reveals a dropdown menu of all the extensions in this category |
|
Reveals a dropdown menu of all the extensions in this category |
|
Reveals a dropdown menu of all the extensions in this category |
|
Reveals a dropdown menu of all the extensions in this category |
|
Reveals a dropdown menu of all the extensions in this category |
|
Opens the Manage Extensions dialog |
Help Menu
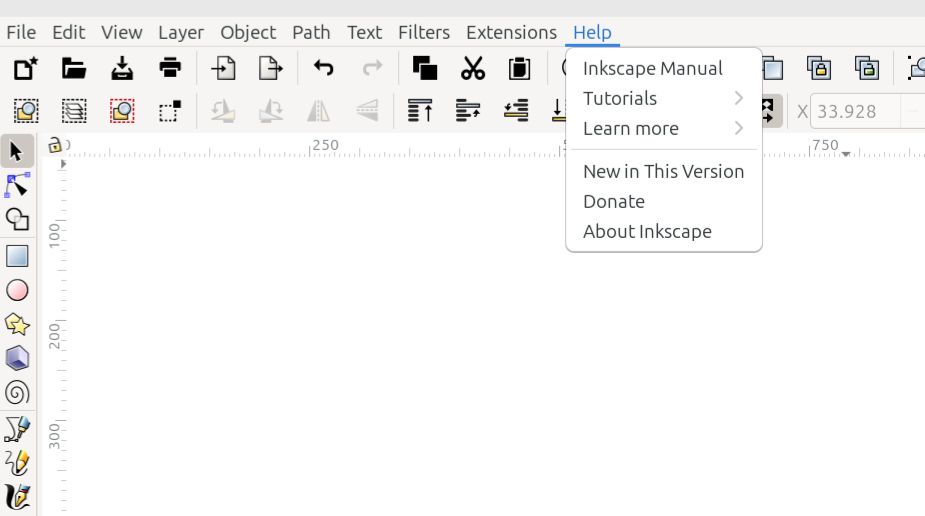
The Help menu
The Help menu offers options to answer users’ specific Inkscape questions and to generally learn how to use Inkscape. Below are descriptions for each item.
Command or Option |
What it Does |
|---|---|
Inkscape Manual |
Opens the Inkscape manual (Note - requires an internet connection) |
Tutorials |
Reveals a dropdown menu of the official tutorials (Note - requires an internet connection) |
Learn More |
Reveals a dropdown menu of additional support items |
New in This Version |
Opens a page on the Inkscape website, that explains new features in this version |
Donate |
Opens a page on the Inkscape website, that explains different ways to donate to the Inkscape project |
About Inkscape |
Opens a window that gives information about this version of Inkscape |
UNFINISHED / IN PROGRESS